Tesla owners can now choose from more than 100 curated color and finish combinations for their vehicles.
Tesla’s color PPF revolutionizes your car with vibrant, customizable layers that provide serious protection benefits. Regular vinyl wraps don’t match up to colored PPF’s exceptional durability, which lasts 7-10 years with impressive self-healing capabilities and superior UV resistance. Your Tesla stays looking fresh because this high-tech film prevents fading and oxidation while keeping its vibrant color.
Looking to make your Tesla unique? Colored PPF installations give you the best of both worlds – they create stunning visual impact and protect against chips, scratches, and environmental damage. Tesla’s direct service for Model 3 and Model Y comes in both gloss and matte finishes, with seven exclusive colors ready for selection.
You’ll need to budget between $7,500 to $10,000 based on your requirements. The cost might seem high initially, but a colored PPF wrap protects your Tesla’s original paint and helps preserve its resale value.
This piece shows you the exact steps needed for proper Tesla color PPF installation. You’ll learn how to get professional-quality results without making costly mistakes that could damage your investment. Let’s head over to the details!
Understanding Color PPF for Tesla
The jump from standard clear protection to color PPF for Tesla vehicles shows how far we’ve come in automotive esthetics and protection. Color PPF does more than change your car’s look, it completely changes how we think about protecting vehicles.
What makes color PPF different from clear PPF
Color PPF stands out from traditional clear films with its innovative build and features. Made from thermoplastic polyurethane (TPU), color PPF combines protective qualities with vibrant, customizable color layers. The key difference is simple, clear PPF just protects your paint, but color PPF reshapes your Tesla’s appearance.
The structural benefits are substantial. Color PPF typically measures around 8 mils thick, which gives better protection against rock chips and scratches than standard vinyl wraps. This extra thickness creates higher gloss clarity with minimal orange peel texture that looks just like factory paint.
These films last much longer too. You can expect 7-10 years of life, nowhere near what vinyl wraps offer. Tesla owners who plan to keep their cars get great value from this extended durability.
There’s another reason color PPFs stand out: built-in self-healing technology. Small scratches vanish with heat from sunlight or warm water. Picture coming back from a road trip with tiny scrapes from branches or road debris, quality color PPF makes these marks disappear like magic.
Benefits of colored PPF for Tesla owners
Tesla owners get many practical advantages from color PPF beyond looks. The film creates a shield against environmental threats, road debris, minor scrapes, bird droppings, and harsh weather. Your Tesla’s original paint stays perfect underneath.
UV protection is crucial too. Sun exposure can damage your Tesla’s paint, but color PPF stops this from happening. The film stays vibrant and keeps the original paint safe beneath it.
You can’t overlook how reversible this is. Unlike permanent paint changes, you can remove color PPF without hurting your Tesla’s factory finish. This lets you switch colors or go back to original whenever you want, perfect if you like changing things up.
Green-minded Tesla drivers will appreciate that color PPF is better for the environment than repainting. The process uses fewer chemicals and creates less waste than traditional paint jobs. This lines up with what many Tesla owners believe in.
Color PPF helps keep your car’s value high. Future buyers will love seeing perfect original paint under the protection. You might call it an investment that protects both your car’s looks and its worth.
How it improves both style and protection
Color PPF offers amazing style options including:
- Finish varieties: Gloss, matte, satin, and metallic finishes let you customize exactly how you want
- Color-shifting films: Colors change as light hits them, creating eye-catching effects
- Metallic finishes: Create a shimmer that turns heads from every angle
- Matte options: Give your car subtle sophistication that absorbs light instead of reflecting it
The film hides small flaws too. If your Tesla has minor scratches or swirl marks, color PPF covers them up. This makes it great for pre-owned Teslas since it both hides existing damage and stops new problems.
Protection benefits are huge. Color PPF shields against rock chips, bugs, bird droppings, and scratches. It also blocks UV rays that would fade your Tesla’s color.
Think of color PPF as your Tesla’s armor and fancy suit combined. It gives serious protection from daily hazards while making your car look custom-designed. Tesla owners who just need both style and substance will find this balance perfect.
The self-healing technology keeps your Tesla looking fresh without much work. Heat makes small scratches vanish, so your car stays showroom-perfect.
Premium looks paired with serious protection make color PPF perfect for Tesla’s design-focused cars. Your Tesla becomes uniquely yours while staying safe for daily drives.
Choosing the Right Color and Finish
Choosing the perfect shade for your Tesla color PPF starts an exciting customization experience. You now have more than 100 curated color and finish combinations at your disposal, which go way beyond the reach and influence of factory paint choices.
Popular Tesla PPF color wrap options
Several standout color PPF choices have caught Tesla owners’ attention by combining eye-catching style with practical protection:
- Satin Stealth Black – Your Tesla gets a stealthy, aggressive look that highlights its futuristic lines
- Satin Ceramic White – A clean, sophisticated appearance with modern texture
- Satin Rose Gold – The ideal choice to achieve a premium, distinctive look
- Glacier Blue – A cool, tech-forward esthetic that matches Tesla’s innovative design
- Forest Green – An earthy, distinctive alternative to standard colors
- Crimson Red – Shows power and energy for bold personality expression
Specialized offerings like RGBG’s Gloss Porcelain Blue and Anodized Cosmic Blue have gained popularity among Tesla enthusiasts who want something unique. The Anodized Cosmic Blue changes its appearance under different lighting conditions.
Model 3 owners often pick Satin Black, Gloss Miami Blue, and Gloss Metallic English Green. These colors highlight the Model 3’s clean design lines beautifully.
Color PPF wraps range from $7,500 to $10,000 based on your needs. While this is a significant investment, quality color PPF keeps your original paint protected for up to 10 years, much longer than regular vinyl wraps.

Gloss, matte, satin, and metallic finishes
Your chosen finish plays a crucial role in your Tesla’s final look:
Gloss Finish produces a mirror-like, highly reflective surface that brings out vibrant factory colors. Red Multi-Coat, Deep Blue Metallic, and Pearl White Teslas shine brilliantly in sunlight with gloss PPF. This finish remains a top choice in Montgomery County.
Satin Finish delivers a smooth, subtle sheen that’s less reflective than gloss but more refined than matte. Dark Tesla colors like Solid Black or Midnight Silver work great with this option. Model Y and Cybertruck owners love satin for its futuristic, premium appeal. Satin-finished Teslas have become a common sight in affluent areas like Bethesda and Ellicott City.
Matte Finish creates a non-reflective surface that absorbs light instead of reflecting it. This sophisticated choice gives a modern look and helps hide minor imperfections.
Metallic Finish uses tiny metallic flakes that create depth as light moves across the surface. Options like Gloss Metallic Soul Red give your car an energetic, attention-grabbing appearance.
Color PPF shows higher gloss clarity with minimal “orange peel” texture compared to vinyl wraps, which makes it look more like factory paint.
How to match color PPF with Tesla models
Each Tesla model has unique features that work well with specific color PPF options:
Model 3 has clean, simple design lines and ranks as the most wrapped Tesla model. Its straightforward contours allow installers to apply PPF cleanly. Here are some great combinations:
- Deep Blue Metallic Model 3 pairs perfectly with XPEL Stealth satin finish
- Matte Black creates a bold yet minimalist look
Model Y’s larger surface areas maximize protection benefits. This family-friendly design works great with matte and satin wraps. Some owners choose hybrid styles by mixing full satin wraps with gloss black accents on the roof, mirrors, or spoilers.
Model S and Model X, Tesla’s luxury flagships, look amazing with premium finishes like metallic and pearl that enhance their sophisticated presence. Satin Gold adds exotic flair and transforms these models into true showstoppers. The Model X looks particularly striking with color-shifting films that change based on viewing angle and lighting.
Tesla now offers direct vinyl wrap services at their service centers, but only for Model 3 and Model Y vehicles made in 2023 or later, plus Cybertruck. Your car needs to be dent and scratch-free before installation since imperfections will show through the film.
Color PPF vs Vinyl Wrap: Key Differences
Tesla owners often ask about PPF and vinyl wraps. These two choices can affect your car’s looks, toughness, and value for years. Let’s break down what makes them different.
Durability and protection comparison
The materials tell us a lot. Color PPF uses thermoplastic polyurethane (TPU), while vinyl wraps use polyvinyl chloride (PVC). This creates big differences in how they perform.
PPF’s thickness gives it an edge. At approximately 8 mil thick, color PPF protects three times better than vinyl wraps at 2-3 mil. Your car gets better protection from rock chips, scratches, and daily wear.
Self-healing makes PPF stand out. Small scratches on color PPF vanish with heat from sunlight or a heat gun. Vinyl wraps can’t do this – scratches stay until you replace the wrap.
The lifespan difference is clear. Quality color PPF can protect your Tesla for 7-10 years or longer with good care. Vinyl wraps need replacement after 3-5 years. This matters even more in places with harsh sun or lots of road debris.
Protection levels are quite different:
- PPF advantages: Creates a strong shield against rock chips (85% less damage), chemical stains, bird droppings, and acid rain
- Vinyl limitations: Helps with UV protection (60% less fading) but doesn’t resist impacts well
Visual depth and finish quality
Color PPF looks great while protecting better. Tesla owners say it has better gloss clarity than vinyl wraps. The surface shows less “orange peel” texture, looking more like factory paint.
Color PPF’s thickness creates richer visuals than vinyl. Premium color PPF products add a special SiO2 top coat that repels water. This makes cleaning easier and adds depth to the finish.
Both options come in:
- Gloss
- Matte
- Satin
- Metallic
- Color-shifting effects
Color PPF keeps looking good longer. Vinyl can tear around door handles and mirror corners as it ages. Quality color PPF stays 98% clear throughout its life, backed by warranties.
Cost and long-term value
The price difference is clear upfront. A full-vehicle PPF installation costs $5,000 to $8,000+, depending on your Tesla model. Vinyl wraps cost $2,000 to $4,500, making them cheaper at first.
The math works better for color PPF if you’re keeping your Tesla long-term. Here’s a 5-year cost breakdown:
Color PPF:
- Initial cost: $5,000-$8,000
- Maintenance: $500-$1,000
- Total: $5,500-$9,000
Vinyl Wrap:
- Initial cost: $2,000-$5,000
- Maintenance: $750-$1,500
- Potential replacement: $2,000-$5,000
- Total: $4,750-$11,500
Money savings go beyond direct costs. Color PPF can save up to $4,200 in repaint costs over 7 years. Vinyl wrap might add $1,500 to resale value after 5 years.
PPF costs about $0.50 per mile over 100,000 miles, while vinyl costs $0.35. Vinyl’s lower cost doesn’t include replacing it every 3-5 years.
Good PPF maintenance pays off at sale time. Your Tesla could be worth 10-20% more than cars with damaged exteriors.
Tools and Materials You’ll Need
You’ll need the right equipment to get great results with Tesla color PPF installation. Professional tools are a must – taking shortcuts will only give you bubbles, wrinkles, or peeling issues down the road. Here’s what should be in your toolkit before you start this project.
PPF squeegee, heat gun, and cutting tools
The right application tools will make your colored PPF Tesla installation successful:
- Squeegees – You should get both hard and soft-edge types. Hard squeegees (80-durometer) work best for the original application. Soft squeegees (30-durometer) help prevent scratches during final passes. Look for felt-edged ones that move smoothly on the film.
- Heat gun or infrared heat lamp – Your success depends on temperature control. A good heat gun with adjustable settings helps activate adhesives, remove bubbles, and shape film around Tesla’s complex curves. Professional models show digital temperature readings to control between 200-300°F.
- Cutting tools – Don’t use regular box cutters. Get a precision knife with replaceable blades and ceramic safety blades made for PPF work. Ceramic blades help prevent accidental paint scratches while trimming.
- Snap-off blade knife – You’ll need this to create clean edges without lifting the film during cuts.
- Tucking tools – These plastic tools help push film into tight spots around headlights, mirrors, and panel gaps on your Tesla.
- Laser measuring tools can improve your accuracy when you pre-cut film for complex areas like Tesla’s distinctive hood contours or curved rear quarters.
Surface prep solutions and microfiber cloths
Your final results depend on perfect preparation:
Surface cleaners must eliminate all contaminants. Use this three-step system:
- Automotive soap wash removes general dirt
- Clay bar treatment extracts embedded particles
- Isopropyl alcohol solution (70%) gives final degreasing
Microfiber towels need special care – standard ones often have abrasives that can scratch. Get automotive-grade (300+ GSM) microfiber cloths and keep separate sets for washing, drying, and solvent application.
Slip solution creates a liquid layer you need to position film. Mix baby shampoo with distilled water (about 5 drops per 32oz) in a spray bottle with adjustable settings. You can also use dedicated PPF slip solutions for consistent results.
Tack solution helps with final positioning – this second spray increases adhesion once your film lines up perfectly. Many pros use a slightly stronger soap-water mixture here.
Keep all solutions in labeled spray bottles that can give either fine mist or steady streams.
Recommended brands and kits
Brand quality varies a lot. These manufacturers get top ratings for Tesla PPF color wrap projects:
- XPEL has complete kits made just for Tesla models. Their Tesla Model 3 kits come with pre-cut patterns that take out the guesswork. Their application tool kit ($125-175) has all the essential items you need.
- 3M makes excellent squeegees and precision cutting tools that pros love. Their Pro Installation Kit gives you commercial-grade equipment that works well for home installers.
- VViViD offers good starter kits that include the basics without cutting corners on important features.
These specialized items work great for Tesla colored PPF installations:
- Eastwood heat gun with digital display ($89-119)
- Geek Wraps “Blue” squeegee series ($15-25 each)
- Knifeless tape for clean edges without cutting ($15-25 per roll)
Starter kits cost from $75 for basic packages to $300+ for professional setups. Quality tools can handle multiple installations, so they’re worth the investment if you plan to maintain your Tesla color change PPF or work on several vehicles.
Step-by-Step Installation Process
Installing color PPF on your Tesla takes precision and patience. The process might look simple at first glance, but each step needs careful attention. This piece will help you add professional-quality colored PPF to your Tesla.
1. Clean and prep the Tesla surface
Your Tesla needs to be spotless. Any dirt trapped under the film will stick out badly.
Start by washing your Tesla with automotive soap and water, then dry it with a clean microfiber towel. Get rid of all dirt, grease, and wax since these will stop the film from sticking properly.
The best time to install PPF is during dry and warm weather. The temperature is a vital factor that affects how well the film sticks and settles. After you finish, don’t wash your vehicle or let it get rained on for at least 24 hours.
A clay bar treatment helps pull out tiny particles regular washing can’t remove. This gives you the clean surface you need for perfect application.
2. Measure and cut the PPF film
You have two options to get PPF for your Tesla:
- Pre-cut kits made specifically for your Tesla model
- Bulk film you’ll need to measure and cut yourself
With bulk film, use twine to measure around curves. Test the fit with paper templates first. This saves you from making expensive mistakes with the actual PPF.
If you’re using pre-cut kits, check each piece against your Tesla’s panels before peeling the backing. The left and right film pieces work only on their specific sides, the backing should match your car’s body shape.
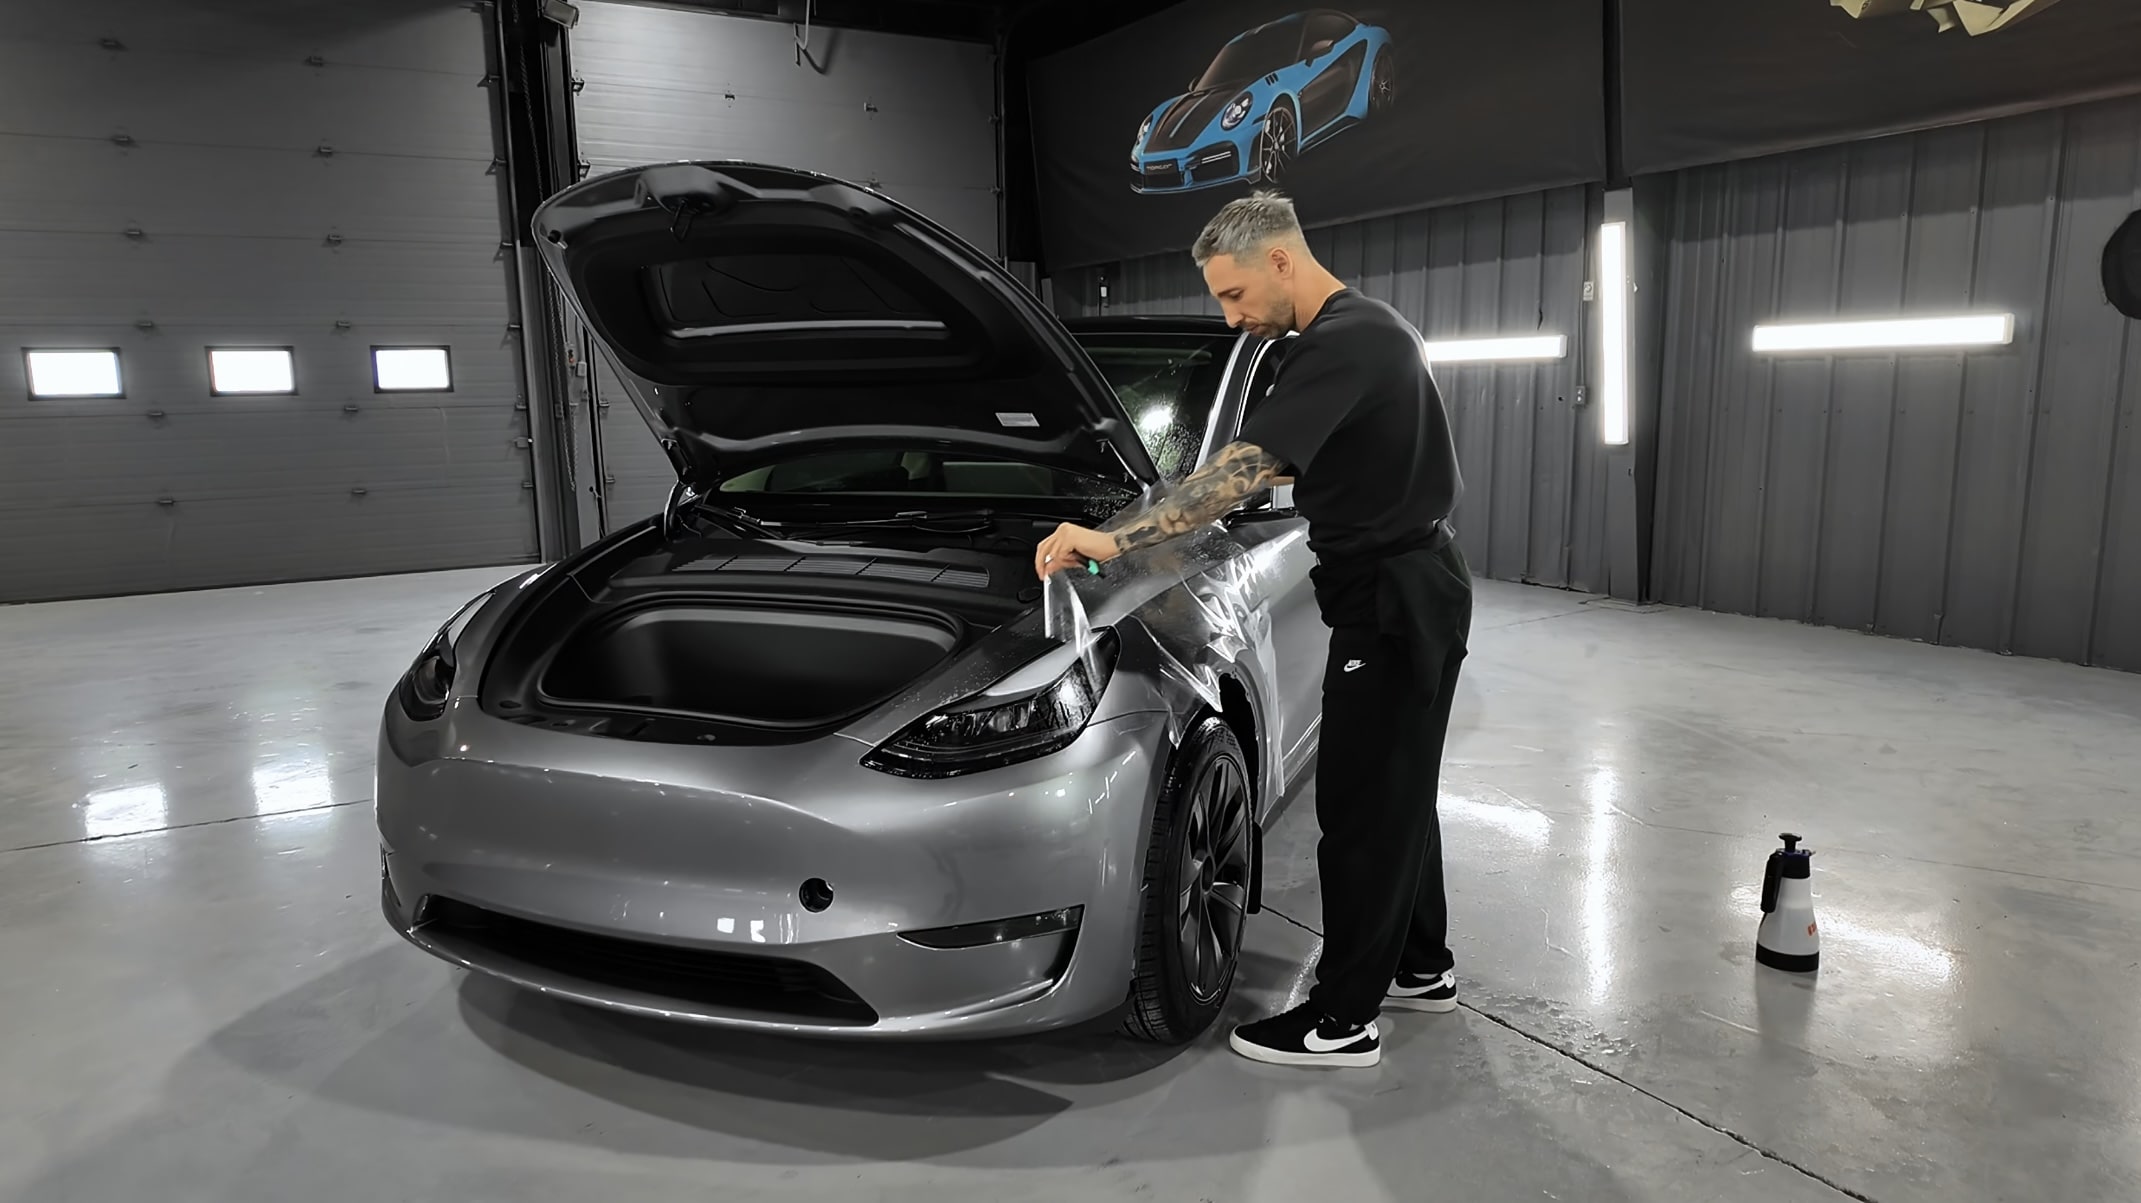
3. Apply the film with proper alignment
This step can make or break your installation:
- Mix a slip solution with about 15% baby shampoo and 85% water in a spray bottle
- Shake the mixture really well
- Spray plenty on both the car surface and film
- Peel the film from its backing carefully, and spray slip solution on the sticky side too
- Put the film on your Tesla and line it up with panel edges. For quarter panels, match the bottom of the film with the rocker panel and the rear with the quarter panel. Add more slip solution as needed to move the film into the right spot.
Important warning: The film should never hang off your Tesla’s edge.
4. Use heat and squeegee to remove bubbles
After getting the position right:
- Work from top to bottom
- Push out air bubbles with your squeegee, moving from center to edges
- Use steady, even pressure
Colored PPF needs a “double take” approach to get rid of all slip solution layers. This stops future bubbling or lifting. Tough bubbles call for a tack solution (usually 20% alcohol, 80% water) that helps the film stick while removing trapped moisture.
5. Trim edges and wrap corners
You’ll need steady hands and sharp tools for trimming:
- Take off sensitive parts like cameras first if they’re in the way
- Heat curved areas before wrapping edges
- Fold edges inward without stretching to avoid tension pulling back later
- Use quick bursts of high heat on tight corners to help the film conform
- Wrap edges around to the back of panels when you can. This creates a clean look and keeps dirt from building up at the edges.
6. Final inspection and curing
Check your work under bright light. Look for:
- Air or moisture bubbles
- Edge alignment problems
- Spots where the film hasn’t stuck properly
Small bubbles might disappear as the film cures over a few days. Talk to the film manufacturer if stubborn bubbles stay after curing.
The full cure takes 1-2 weeks depending on your PPF brand and weather conditions. During this time:
- Don’t wash your Tesla
- Keep it away from extreme heat or cold
- Try to protect it from direct sunlight
A proper cure creates the strong bond your PPF needs to last. Once it’s fully cured, your Tesla’s color PPF will protect it for years while giving it that eye-catching new look.
Tesla Model-Specific Tips
Tesla models each come with unique challenges for color PPF installation. You’ll need different approaches depending on which electric vehicle is sitting in your garage.
Model 3 and Y: simpler curves, easier install
Here’s great news for Model 3 and Y owners! These cars are the most DIY-friendly Teslas you can work with. The Model 3 has become the most commonly wrapped Tesla because its clean design lines make installation much smoother. Satin Black, Gloss Miami Blue, and Gloss Metallic English Green are popular choices that really show off the car’s sleek profile.
The new Model Y brings even better news – it’s much easier to wrap than older versions. The front bumper now has more straight edges instead of curves and tight corners. The hood’s squared-off design makes it easier to arrange the film.
The new Model Y’s rear bumper design is a big improvement too. It now comes in two small pieces instead of one long section, which makes installation much simpler. Many underbody areas now use plastic parts instead of painted surfaces, so you won’t have to worry about those sections.
Model S and X: larger panels, more precision needed
These luxury flagships need extra care. Model S and X look best with high-end finishes like metallic and pearl options that improve their sophisticated look without losing elegance. Their bigger surface areas need more precision and patience during installation.
Use plenty of slip solution on curved areas of these premium models. This helps the film move freely and lets you position it accurately. Breaking larger panels into smaller sections works well – start from the middle and work your way out. This approach is a great way to get better results on these larger vehicles.
S and X models have front bumpers with lots of curves and angles. Use low heat carefully to help the film bend around tight corners. Make sure everything lines up around headlights and grille openings before final placement.
Door jambs and complex areas
Tesla’s door handles can be tricky to work with. Remove them if you can before applying PPF – you’ll get cleaner results. If that’s not possible, use much of either tack solution around handle areas to help it stick better.
The areas near cameras can be challenging. Think about removing fender cameras first since they can make precise alignment difficult. You might also want to temporarily remove tail lights to get perfect installation.
Sharp edges on Teslas need special care. Some installers use a blowtorch on really tough edges. Door edges stay stuck better when you use adhesive promoter in these high-stress spots.
The spaces between pillars and door gaps are often the trickiest parts. These sections need extra attention since they’re usually the first places where lifting or bubbling shows up.
Common Mistakes to Avoid
You need to avoid critical errors to get perfect color PPF installation right. As the saying goes, “measure twice, cut once” applies tenfold to Tesla’s color PPF application. Let’s get into the mistakes that can ruin your investment.
Skipping surface prep
Successful colored PPF Tesla installation starts with proper surface preparation. Leftover dirt, grease, or wax creates trouble spots where bubbles form and adhesion fails. Think of surface cleaning like following a precise recipe – miss one ingredient and your final result suffers.
Start by washing thoroughly with automotive soap and water. A clay bar helps extract embedded contaminants you can’t see with your naked eye. Adding a little alcohol to your cleaning solution helps it work better. Smart professionals spray water on garage floors to keep dust down since tiny particles create bumps under your Tesla PPF color wrap.
Overstretching the film
Color PPF works differently from vinyl wrap – many DIYers learn this the hard way! PPF doesn’t just need excessive heat or stretching like vinyl does. Too much pulling creates tension that lifts edges and causes ugly wrinkles later.
Warm water in your solution works better than a heat gun for complex curves. The film becomes more pliable without risking damage. Note that you should only use heat for massive stretches or drying edges for wrapping.
Not using enough slip solution
Being stingy with slip solution quickly causes problems. Your film should glide freely across the surface – you just need more solution if you hear sticking sounds during positioning. Apply plenty to both the panel and the PPF’s adhesive side.
Keep spraying throughout installation. Fill your bottles before starting each panel so you don’t run dry halfway through. This simple step keeps your squeegee from scratching the film.
Ignoring temperature and humidity
The environment can make or break your Tesla color change PPF project. You want temperatures between 18-25°C (55-90°F). The humidity should stay between 40-70%.
Stay away from direct sunlight and keep wind speeds under 5 mph. Some installers work in colder conditions by warming the garage and car first, but this makes things riskier.
Your freshly installed PPF needs protection from extreme heat sources and humidity changes to cure properly. High temperatures might speed up curing too fast, while too much humidity affects how well it sticks.
Maintaining Your Tesla Colored PPF
Your Tesla’s color PPF investment will last longer with the right maintenance. Your protective film needs regular care to keep its vibrant look and protective qualities, just like your Tesla needs consistent charging.
Washing and drying best practices
The longevity of your PPF depends on regular washing. Your Tesla needs cleaning every two weeks to stop dirt from building up and damaging the film. A pH-neutral car shampoo made for PPF-protected vehicles works best.
The two-bucket method gives excellent results with colored PPF:
- First bucket: Soapy water solution
- Second bucket: Clean rinse water
- Wash mitt: Use only microfiber
This method stops dirt from getting back on the film after you clean it. Start from your Tesla’s top and move downward while cleaning one panel at a time.
Keep a waterless wash solution and microfiber cloth in your car to handle quick cleanups. This helps you remove bird droppings, bug splatter, and tree sap before they stain permanently.
Water spots can form quickly on PPF and become tough to remove. Use soft microfiber towels and pat dry gently instead of letting your Tesla air dry.
Avoiding harsh chemicals
Gentle care keeps your Tesla’s colored PPF in top shape. Harsh chemicals can harm the film and reduce its lifespan. Stay away from products that contain:
- Alcohol
- Bleach (sodium hypochlorite)
- Citrus-based ingredients
- Naphtha or petroleum distillates
Pick biodegradable, non-toxic cleaning solutions labeled safe for PPF. Many Tesla owners get great results with Optimum No Rinse (ONR) or similar rinseless wash products.
When to reapply or replace film
Quality color PPF usually lasts 5-10 years if you take good care of it. Check your PPF around the 5-year mark. Monthly checks help you catch problems early.
Watch for these signs that tell you it’s time to replace:
- Yellowing or browning of the film
- Color shifts or fading
- Surface scratches that no longer self-heal
Discoloration shows up 3-5 years after installation and means UV exposure has started breaking down the film. You’ll need to replace the PPF then to keep both protection and looks.
New paint needs 30 days to cure before you can apply fresh PPF.
Conclusion
Color PPF gives Tesla owners a way to protect and personalize their vehicles. This piece covers everything from picking the right color to becoming skilled at application for perfect results. This product outshines traditional vinyl wraps with better durability, self-healing capabilities, and deeper visual appeal.
Quality color PPF lasts 7-10 years, making it a smart investment compared to vinyl wraps that need replacement every 3-5 years. The thicker material offers better protection against road debris, UV damage, and environmental threats.
Clean surfaces, good tools, and patience during installation create amazing final results. The process needs attention to detail, but following these steps helps you get professional results without getting too pricey.
Your Tesla needs the best protection available. Each model has unique requirements – what’s perfect for a Model 3 might need tweaking for Model S or X installation. Understanding your vehicle’s specific contours prevents problems during application.
Simple maintenance is vital for lasting results. Use pH-neutral soap when washing, dry gently, and avoid harsh chemicals to keep the color PPF looking fresh. If you notice yellowing or reduced self-healing around year 5, think about new protection.
Your wrapped Tesla will catch eyes while staying safe from daily wear and tear. The paint stays perfect underneath while showing off your style outside. Take time to give your Tesla that amazing new look with serious protection – the results make the installation time worth it.